How to Build a Featheredge Fence Using Timber Posts (Ultimate Step-by-Step Guide)
Why Featheredge Fencing Is the Best Choice for UK Gardens
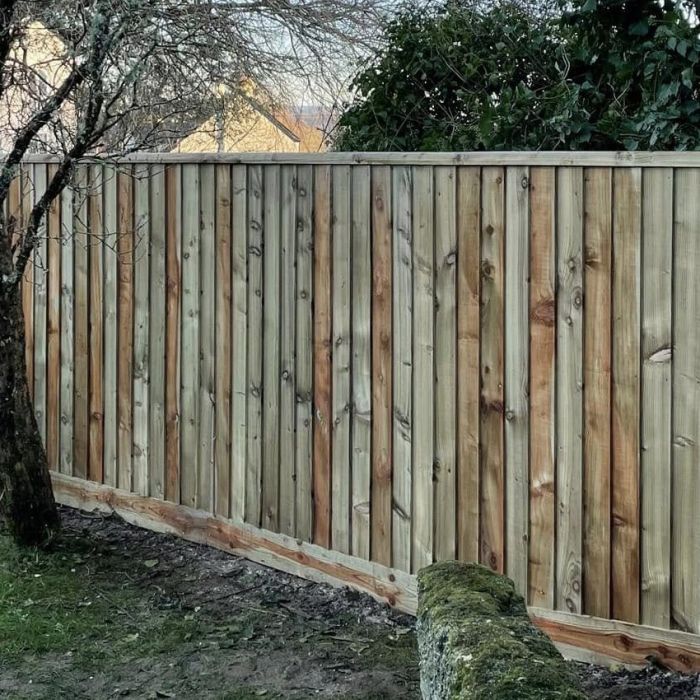
Featheredge fencing is one of the most durable and popular fencing styles in the UK, offering both privacy and security. Unlike pre-made panels, a featheredge fence is built on-site with timber posts, fencing rails, and overlapping boards, giving you full control over length, style, and quality.
Pro Tip: Always use pressure treated timber to prevent rot, insect damage, and weathering.
Tools You’ll Need to Build a Featheredge Fence
Before starting, gather the following tools to make installation easier and more precise:
- Tape measure
- Spirit level
- Spade or post hole digger
- String line
- Hammer or nail gun
- Saw
- Drill or impact driver
Tip: A string line ensures your fence is perfectly straight, while a spirit level keeps posts and rails even.
Materials Required for a Featheredge Fence
You’ll need the following materials:
- Timber fence posts
- Featheredge boards
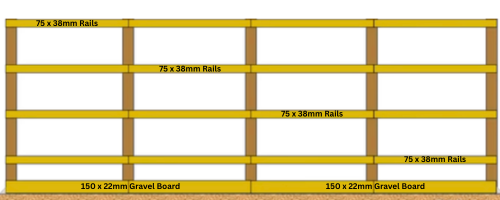
- Fencing rails (75 × 38mm)
- Timber gravel boards (150 × 22mm)
- Galvanised nails or screws
- Post mix
Using high quality, pressure treated timber ensures your fence lasts longer and withstands UK weather conditions.
Step 1: Mark Out Your Fence Line
- Stretch a string line between the start and end points of your fence.
- Measure and mark where each post will go, usually 1.83m (6ft) apart.
- Double check alignment for a straight, professional looking fence.
Step 2: Install Timber Fence Posts
- Dig holes approximately 600mm deep.
- Place posts in the holes, checking vertical alignment with a spirit level.
- Fill with post mix and allow to set completely.
Why this matters: Posts are the backbone of your fence; poorly installed posts can make your fence unstable.
Step 3: Install Timber Gravel Boards
Timber gravel boards prevent featheredge boards from touching the ground, reducing rot risk:
- Fix 150 × 22mm gravel boards between posts at the base.
- Ensure boards are level along the length of the fence.
Step 4: Install Fencing Rails
- Install three horizontal fencing rails (bottom, middle, top) using 75 × 38mm timber rails for fencing 4ft and below. For 5ft and above we recommend 4 rails (bottom, middle, middle, top) as this reduces any warping in the featheredge boards.
- Ensure rails are level and secure on every post.
Properly installed rails provide structural support for the featheredge boards and prevent sagging/warping.
Step 5: Fix Featheredge Boards
- Start at one end and fix the first board vertically.
- Overlap each board by 25mm to create the traditional featheredge effect.
- Secure each board with galvanised nails.
- Continue until the section is complete..
Using your spirit level, every 5 boards check the level to ensure a nice even fence
Step 6: Finishing Touches
- Check boards are straight and evenly spaced
- Trim any boards if necessary
- Optional: add a timber capping for a neat finish
A properly installed featheredge fence provides privacy, security, and long lasting beauty.
Common Mistakes to Avoid
- Posts not installed deep enough
- Boards touching the ground
- Rails not level
- Boards not overlapped correctly
Careful measuring and alignment ensures your fence is sturdy and visually appealing.
Conclusion
Building a featheredge fence with timber posts, rails, and gravel boards is a reliable, long lasting way to define your garden boundary. By following this step by step guide and using quality materials, you can create a durable, attractive fence that will protect your property for years to come.
Here at Oakwell Garden Products, we can provide you with all quality materials and advice you need to build your own Featheredge Fencing.
By Giordan Gosling, Oakwell Garden Products